Mini-greenhouse 6-section MT25-6 6-section
$79.4
Mini-greenhouse 6-section MT25-6 6-section
250 in stock
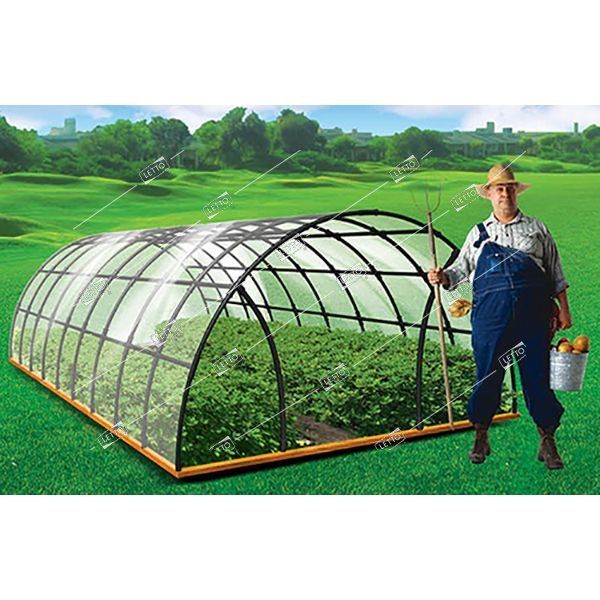
The mini greenhouse consists of plastic tubes connected by special connectors. Easily and quickly assembled and disassembled with your own hands! Assembly and installation instructions for a mini greenhouse; To assemble a mini greenhouse, the kit includes 80 plastic pipes of Ø 25 mm and a length of 64 cm, 25 crosses, 18 tees, 14 pegs and the required number of self-tapping screws. Tees are used for the outer arcs, and for the assembly of five middle crosses. If the pipes go into the connectors very tightly and not to the stop, we recommend holding the ends of the pipes in hot water for 2-3 minutes, after which they will easily fall into place. For the reliability and rigidity of the mini greenhouse, all connections must be fastened with self-tapping screws. Figure 2 shows a variant of installing a mini greenhouse using pegs. If the peg fits tightly into the pipe, we recommend sawing the ribs on the file peg, or cut them with a knife. The ends of the film hanging to the ground are covered with earth. Figure 3 shows the recommended by us option for installing a mini greenhouse on a wooden frame, if you have the necessary boards, or have the opportunity to purchase them. The thickness of the board is 40 × 50 mm, the width is 100 × 150 mm. It is recommended to cover the boards with bituminous mastic or bituminous varnish. In the corners of the frame and in the middle, hammer metal corners or pipes with drilled holes for self-tapping screws or screws into the ground, with which the frame is rigidly fixed in place. Connect the boards to each other from the inside with corners and self-tapping screws. Drill holes Ø 25 mm into the frame, after marking, to a depth of 50-60 mm. If such a drill is not available, then you can drill holes with a smaller drill diameter, then chisel a 25 by 25 mm square with a chisel. It is easier and more convenient to fasten the glasses according to the marking with self-tapping screws, if they are included in the kit. Figure 4 shows a simple and affordable option for every owner to make a gate in a mini greenhouse. On the other hand, instead of a wicket, you can make a window. This is necessary for ventilation and aeration of the greenhouse. All this will give additional rigidity and undoubted convenience during the operation of a mini greenhouse. Options for attaching the film to a mini greenhouse: Nail the film to the pipes with a furniture stapler through the packing tape (“Bingo” tape). Press the film against the pipes with thin wooden slats with self-tapping screws or small nails. Press the film with a rope, screwing it onto the self-tapping screws previously screwed into the pipes. Advantages of installing a mini greenhouse on a wooden frame: It is more stable even under the influence of very strong winds. It can be quickly and inexpensively covered with polycarbonate. To cover the roof with polycarbonate, you will need 2 sheets of 2.4 m long. It is convenient to organize watering by drilling holes in the boards and inserting plastic pipes with small drilled holes along the greenhouse to supply water.
| Weight | 0.020 kg |
|---|


Reviews
There are no reviews yet.